

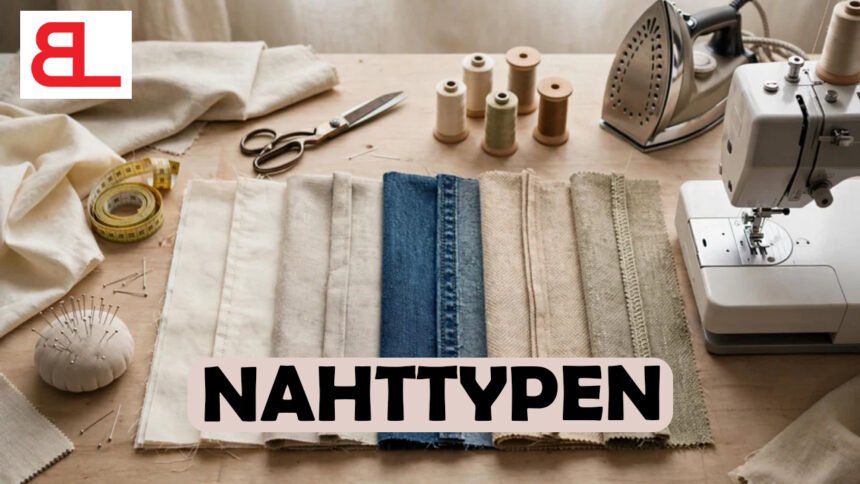
Nahttypen is the German word for seam types, and the choice of seam shapes how a garment looks, feels, and lasts. A seam joins two pieces of fabric, but the way you make it changes everything. You can sew a plain seam by hand or by machine, and the two results will not match. They may look alike on the outside, but the stitches, the speed, the strength, and the finish all work differently.
This guide explains how Nahttypen differ in hand and machine sewing. It uses simple words and clear examples, so a beginner can follow along. You will learn how each method builds a stitch, how common seams change when you switch methods, and which option suits stretch fabric, light fabric, and heavy fabric. By the end, you will know how to choose the right seam for your next project.
What Nahttypen Mean in Sewing
A seam is the line where two or more pieces of fabric meet and are held together with thread. Sewists use the word “Nahttypen” when they talk about the different kinds of seams. Each type has its own shape, its own purpose, and its own way of hiding or showing raw fabric edges.
Think of a seam as a small system with three parts. The first part is the stitch, which is the way the thread loops or locks through the fabric. The second part is the seam itself, which is how the fabric edges sit against each other. The third part is the finish, which is how you treat the raw edges so they do not fray.
The textile industry also sorts this work into official groups. The International Organization for Standardization publishes ISO 4915 for stitch types and ISO 4916 for seam types, and factories use these codes to describe their work. Home sewists do not need to memorize any codes. Still, the idea helps: the stitch and the seam are two separate choices, and both change when you move from hand to machine.
How Hand Sewing Builds a Seam
Hand sewing uses one needle and one thread. You pull the thread through the fabric yourself, one stitch at a time. This gives you full control over every part of the seam, which makes hand sewing a good choice for delicate fabric, small repairs, and tight corners.
The backstitch is the strongest basic hand stitch. You push the needle up through the fabric, move back to the end of the last stitch, and push the needle down again. The stitches overlap, so the thread forms a solid line. On the right side, a good backstitch looks a lot like a machine stitch. Many sewists use it for seams that need to hold under stress, such as the crotch of trousers or the armhole of a shirt.
The running stitch is the fastest hand stitch. You weave the needle in and out of the fabric in a straight line. It works well for gathering, basting, and light seams, but it is weaker than a backstitch because the stitches do not overlap. A running seam can open if you pull on it hard.
The prick stitch is a tailor’s favorite. It is a variation of the backstitch where only a tiny dot of thread shows on the right side. Tailors use it to sew zippers into fine wool and to add a neat, quiet finish. Other useful hand stitches include the whipstitch, which wraps over an edge, and the slip stitch, which closes a seam so that the thread nearly disappears.
Hand sewing does have limits. It takes much more time than machine sewing, and the stitch length changes a little each time unless you work slowly and carefully. Your hands may also tire on thick fabric. Even so, many people love the calm rhythm of it, and a skilled sewist can make hand seams that last for decades.
How a Machine Builds a Seam
A sewing machine works in a very different way. Most home machines make a lockstitch. This stitch uses two threads: one comes from the spool on top, and the other comes from the bobbin below. The needle pushes the top thread down through the fabric, and a hook under the plate catches it and locks it with the bobbin thread. The lock happens inside the fabric, so the stitch looks the same on both sides.
Machine stitches are even and fast. A standard stitch length is about 2.5 millimeters, which gives roughly 10 to 12 stitches per inch. You can change the length with a dial. Shorter stitches make a stronger seam and suit thin fabric, while longer stitches suit thick fabric and basting. A machine can sew in a minute what might take an hour by hand.
Feed dogs move the fabric for you. These small metal teeth sit under the presser foot and pull the layers forward. You guide the fabric, but the machine sets the pace. This is why machine seams look so regular. It is also why layers can slip. If you sew two slippery layers, the bottom layer can creep ahead of the top one, and a walking foot helps fix that.
Other machines make different stitches. A serger, also called an overlocker, uses three to five threads and loopers instead of a bobbin. It sews the seam, trims the edge, and wraps thread around the raw edge in one pass. A chain stitch machine uses loops of thread and can unravel if the end is not secured. Factories use all of these machines, and each one leaves a different kind of seam.
The Plain Seam in Hand and Machine Sewing
The plain seam is the most common of all Nahttypen. You place two pieces of fabric with the right sides together, sew along the edge, and press the seam allowance open. Most American home patterns use a seam allowance of 5/8 inch, which is about 1.5 centimeters.
By machine, a plain seam takes minutes. You line up the edges, set the stitch length, and sew with a few backstitches at the start and end to lock the thread. Then you finish the raw edges with a zigzag stitch, pinking shears, or a serger. The seam stays flat, strong, and neat.
By hand, a plain seam takes more care. You pin the layers, thread a needle, and sew a backstitch along the seam line. Most sewists work with a thread about as long as their arm, because longer thread tangles. Keep each stitch the same size, and pull the thread snug but not tight. A tight pull can pucker the fabric.
The main difference is control versus speed. A machine gives you identical stitches with little effort. A hand seam gives you the freedom to sew in places no machine can reach, such as the inside of a finished collar or a curved hem. Many projects use both: the machine builds the main seams, and the hand closes the last small opening.
The French Seam in Hand and Machine Sewing
A French seam hides the raw edges inside a small tube of fabric. It looks clean on both sides, so it suits sheer, light, and silky fabrics such as chiffon, voile, and fine cotton. Baby clothes and blouses often use it.
You make it in two steps. First, place the fabric with the wrong sides together and sew a narrow seam, about 1/4 inch from the edge. Trim the allowance close to the stitching, press the seam to one side, and fold the fabric so the right sides face each other. The first seam now sits right on the fold. Then sew a second seam about 3/8 inch from the fold. This second seam traps the raw edges inside.
On a machine, the French seam is quick but needs careful pressing. The trimming and pressing steps decide how good the result looks. If you skip the press, the tube will twist, and the seam will look lumpy.
By hand, the French seam looks delicate and feels soft. Use a fine needle and a small backstitch or a tiny running stitch for the first line. Many heirloom sewists prefer hand sewn French seams for christening gowns and fine lingerie, because the stitches stay small and gentle on the skin. The process takes longer, but the seam feels light and flexible.
The Flat Felled Seam in Hand and Machine Sewing
The flat felled seam is a strong seam that encloses both raw edges and lies flat. You see it on jeans, work shirts, and sportswear, usually with two neat rows of stitching on the outside. It works well on woven fabric that gets a lot of wear.
To make it, sew a plain seam with the wrong sides together. Trim one allowance to about 1/8 inch, fold the wider allowance over the narrow one, and fold it again so the raw edge hides inside. Then stitch the fold flat against the garment. The result is a smooth, tough seam with no raw edges at all.
A machine makes this seam fast and sturdy. Many sewists use a felling foot, a special presser foot that folds the fabric as it feeds. The foot guides the folds and keeps the width the same along the whole seam. Without it, you can still fold and press by hand, then topstitch with a regular foot.
By hand, the flat felled seam goes by another name: the run and fell seam. You sew a small running stitch or backstitch, trim one side, fold the other over it, and finish with a slip stitch or hemming stitch. This version appears in historic clothing and in fine shirt making. It takes patience, but the finished seam is strong and comfortable, and it feels smooth against the skin.
Seams for Stretch Fabric
Stretch fabric brings a special problem. A seam that cannot stretch will break when the fabric moves. This matters for knit tops, leggings, swimwear, and dance clothes.
A machine needs a stretchy stitch. A regular straight stitch has little give, so threads snap when you pull the seam. You can use a narrow zigzag stitch, which lets the seam stretch with the fabric. Many machines also offer a stretch stitch, often shown as a small lightning bolt, which sews a few steps forward and one step back for strength and give. A ballpoint or jersey needle slides between the knit fibers instead of cutting them, which prevents holes and skipped stitches.
A serger is the best machine tool for knits. Its looped threads stretch naturally, and the machine trims and finishes the edge at the same time. This is why most store bought knit clothing has serged seams. If you do not own a serger, a zigzag stitch on a regular machine still works well for most home projects.
Hand sewing can handle stretch too. A backstitch has a little built in give if you leave the thread slightly loose, and many hand sewists use it for small knit repairs. Some people sew an extra loop of thread at each stitch to add stretch. Still, a long seam on a stretchy garment takes much longer by hand, so most people use a machine for the main work and a needle for quick fixes.
Seam Finishes for Raw Edges
A seam finish protects the raw edge of the fabric so it does not fray. Many Nahttypen need a finish, and the options change between hand and machine work.
On a machine, you have many choices. A zigzag stitch along the edge is the simplest. Pinking shears cut a zigzag edge that slows fraying on tightly woven cloth. A serger gives the cleanest result in one pass. For lined jackets and fine dresses, sewists often use bias tape to wrap the edge, which is called a bound seam. The Hong Kong finish is a popular version of this method.
By hand, you rely on a few simple stitches. The overcast stitch, also known as the whipstitch, wraps thread around the raw edge. You can also fold the edge under by 1/4 inch and sew it flat with a small running stitch or a slip stitch. A hand finish takes time, but it looks tidy on special garments and costs nothing beyond thread.
A good finish matters most on fabric that frays easily, such as linen, silk, and loose weaves. Cotton knit and felt usually do not need one, because their edges do not unravel.
Strength, Speed, Look, and Cost
When you compare hand and machine seams, four things matter most: strength, speed, look, and cost.
Strength favors the machine for most everyday work. A machine lockstitch pulls thread tight and keeps a steady tension. A hand backstitch can match that strength when done well, but a loose or uneven hand seam may open under stress. Industry tests often measure seam strength by pulling on the fabric until it breaks, and a well made machine seam usually holds up very well under that load.
Speed also favors the machine. A basic machine can sew hundreds of stitches per minute. A hand sewist might make about 20 to 30. For a full garment, the difference can be many hours.
Look depends on your goal. Machine seams look regular and crisp. Hand seams look softer and a little more personal. Some people love this charm and choose hand sewing on purpose. Tailors also use hand stitches where a machine would leave a hard, flat line.
Cost comes down to tools. Hand sewing needs only a needle, thread, and scissors. A machine costs more and needs oil, new needles, and sometimes repairs. A serger costs even more. For a beginner, a small starter kit is a gentle way to learn how Nahttypen work before buying any machine.
How to Choose the Right Seam
Start with the fabric. Light, sheer fabric works best with a French seam. Heavy woven fabric suits a flat felled seam. Knit fabric needs a stretch stitch or a serger. Most other fabric does well with a plain seam and a simple finish.
Next, think about wear. A seam on a pair of work pants takes far more stress than a seam on a pillow cover. Pick stronger Nahttypen and shorter stitches for items that will see heavy use. Choose softer, lighter seams for items that touch the skin or hang loose.
Then think about your time and tools. If you need a fast result and own a machine, use it. If you have only a needle or you enjoy slow work, choose a hand seam that fits the project. If the garment has tight curves or delicate trim, mix the two methods and let each one do what it does best.
Always test first. Cut two small scraps of your real fabric and sew a sample seam. Pull on it, press it, and look at it in daylight. A five minute test saves hours of fixing later.
Practical Tips for Better Seams
A few habits improve every seam, no matter which method you use. Wash and dry your fabric before you cut it, because shrinkage can pucker finished seams. Match your thread to your fabric: cotton thread suits cotton cloth, and polyester thread suits knits and synthetics. Use a new needle for each big project, since a dull needle makes weak or skipped stitches.
Press as you sew. A hot iron sets the stitches and makes the seam lie flat, which gives the whole garment a more professional look. Use a pressing cloth on delicate fabric to protect it from scorching.
Finally, practice. Start with a plain seam in both methods, then try a French seam and a flat felled seam. Your hands will learn the feel of each one faster than any book can teach it. Within a few weeks, you will pick the right seam without thinking about it.
Conclusion
Nahttypen differ in hand and machine sewing mainly in how they make the stitch, how fast they come together, and how they look when finished. Hand sewing gives you control, softness, and access to tight spots. Machine sewing gives you speed, strength, and even stitches. Both methods can produce plain, French, and flat felled seams, and each method has a place in a good sewing practice.
Choose your seam by fabric, wear, and the tools you have. Test it on a scrap, then sew with confidence. With a little practice, you will know which seam fits each project, and your sewing will look neat and last for years.
Frequently Asked Questions
What is the strongest seam for everyday clothing?
The flat felled seam is one of the strongest, and it appears on jeans and work shirts. A plain machine seam with a short stitch length also holds up well for most clothes.
Is a hand sewn seam as strong as a machine seam?
A well made backstitch can come close to a machine lockstitch. A running stitch is weaker, so use it only for light work.
Which seam works best for stretch fabric?
A serger seam works best, and a narrow zigzag or stretch stitch on a regular machine also works. Use a ballpoint needle to protect the knit fibers.
Do I need to finish every seam?
No. You need a finish on fabric that frays, such as linen or silk. Many knits do not fray and can stay unfinished.
Which Nahttypen should a beginner learn first?
Start with the plain seam, then learn the French seam and the flat felled seam. These three cover most home sewing projects.